Creation of flyers for advertising. Flyers are a good way to attract customers
A flyer can be an inexpensive and effective way to reach out to people when you're trying to find a lost kitten, advertise guitar lessons, or invite people to your Friday gig. For your flyer to be effective, you first need people to paid attention to him. Then it is necessary that he motivated them to take action. This article will help you achieve what you want!
Steps
Part 1
Choose the necessary components-
Write a title. Make it easy to understand, make it big and bold. The title should consist of only a few words, placed in one line in the center. The headline can be longer, but it will be less likely to grab anyone's attention.
Highlight LARGE font! The title font should be larger than the font of the rest of the text. People should be able to quickly read it from a distance of 3 meters. The heading should be placed evenly across the width of the page. If it turns out not very beautiful, then try placing it in the center of the sheet.
Use capital letters and curly fonts. Look at the headlines on the front pages of newspapers; this is the trick that printed editions have been adopted for a long time. Choose a font that is not too pretentious, as the main goal is still to convey information. You can apply your design talent to other parts of the flyer if it complements its content.
Write very simple text. You need to draw attention to the flyer and get the message across in seconds. Complex text will not be successful. More detailed description you can write in the body text of the flyer, but not in the title.
- Do not force people to think about the meaning of the text of the message - it should cling to a person on an emotional level. Come up with a catchy and funny headline.
- What headlines grab your attention? If you consider yourself one of the mainstream people, then "puppies and ice cream" will obviously attract your attention. And it's not because everyone loves puppies and ice cream; just bright red always attracts attention. (However, it is obvious that many people love puppies and ice cream, and the surprise effect and humorous content increase efficiency.)
-
Add subheadings. The subheading should contain no more than two or three lines. Because the title is short, the subtitle elaborates on the title, providing the reader with more detailed information. Read examples of subheadings in newspapers or press releases.
Add more details. While the purpose of the headline is to grab attention, your flyer's follow-up text will convey the whole story to the reader. necessary information. The information should include 5 items: Who, What, When, Where and Why. These are the questions people are bound to have while reading your flyer. Put yourself in the place of the reader. What exactly would you like to know?
- Be clear and specific. Keep your text short but meaningful.
-
Place recommendations in your flyer. You can include endorsements in the flyer content. A good recommendation will not only provide you with a detailed description, but also legitimize your flyer in the eyes of third parties. If the reader can take your point of view, they are more likely to follow the call in the flyer.
Set the accents. For underlining keywords large or more fanciful type, italics, and so on should be used. However, do not apply everything at once, but make one or two accents. Too many different formats can look childish at best, or even crazy.
Give structure to the flyer. Add key points to text. Sub-clauses in the text will add structure and visual appeal to the flyer. This will make the flyer look more professional, which is very important for its overall look.
Use other fonts that grab attention. The text in the flyer content does not need to be in the same font as the headline. Your flyer needs to stand out in some way, so it's smart to use something different from the rest of the flyer crowd. You should already have a wide variety of fonts installed on your computer, but if you don't find the right one, you should try downloading additional ones. Many sites offer free downloads of unusual and unique fonts.
Add your contact information. Add contact information preferably at the bottom of the flyer so that the more important information stays at the top. Add your name and all necessary contact information; phone number and email address are the most common contact details.
- You can also make a "tear-off" version of the contact details. Create a compressed version of the text, rotate it 90 degrees, and copy it a few times at the bottom of the flyer. Make a partial cut between these copies so that people can tear off the contact information.
- Do not post personal information. For example, you should not include your last name or home address.
-
Add a picture or drawing. The picture most often has the same meaning as the text itself. The human brain often perceives the picture, and only then the content of the flyer. You can take advantage of this! Give people something they will remember, because visual messages are sometimes more important than text messages. An image is an effective element, whether it's a logo, a photo of a lost dog, or just a picture.
Find an image. You don't have to create a new picture. You can use one of your personal photos or use a picture from the Internet. Some computer programs, such as Microsoft Office offer a wide range of pictures.
Use an image editing program to increase the contrast of the picture. This will help make the picture more visible from afar. If it is impossible to use graphic editor should take advantage free application Picasa (http://picasa.google.com/) by Google, which will help you with this.
- Whenever possible, a single image should be used per flyer. But if necessary, you can use two images next to each other, but no more, because your flyer will become overloaded with pictures and you will not be able to attract people's attention.
-
Give a description below the picture. If you have already attracted the attention of a person, then he will definitely come closer and read the flyer. The description will help to convey in more detail the information that the picture displays.
Select the image with a frame. The frame will help to "highlight" the picture in the flyer, which will not allow it to merge with the rest of the content. Make a frame or light shadow around the picture. For extra emphasis, you can even add asterisks or an arrow pointing to the picture.
-
Make copies. Once the flyer is complete, it's time to print the required number of copies.
- If your printer can't handle that many copies, or if it's going to rain (home printer ink is not suitable for rainy weather), find a company or shop nearby that can help you print good quality flyers.
- Black and white printing is cheaper than color printing, but it won't be as effective. If you still decide to choose a black and white version, then you should do the following: leave the space for the title empty and, after printing, enter it with a colored marker. Even with a marker, the flyer will look great.
Decide if you want to make your flyer by hand or on a computer. You can create a flyer on your computer using Photoshop or Microsoft Publisher. You can also make it first with a pen, pencil, marker, and so on, and only then multiply it on a xerox in a specialized store.
If possible, make a colored flyer. You can use color in inscriptions, pictures, or print on colored paper. The color will grab people's attention. Printing in black on colored paper can also be efficient and cost effective.
Decide on the flyer size. The size of the flyer depends on its purpose and on the technical capability of the printer. The easiest way is to make a flyer in a specific format suitable for the printer (21.59 by 27.94 cm). Your flyer can fit the size of the sheet, or you can split it in half or even into 4 parts if you want to get flyers of small sizes (for example, if you need them for distribution). You can make flyers of any size, and if you have a large format printer, you can significantly increase them in size.
Determine the possibility and place of distribution of flyers. Do you plan to hang them on bulletin boards and telephone poles? Or do you want to hand out flyers at an event or in a busy part of town? If necessary, you can even send them by mail. When placing flyers outdoors, you should use heavier paper and waterproof paint.
Part 2
Headline WritingPart 3
Add some charm to your flyerPart 4
Using ImagesPart 5
Circulation and distributionMake sure your flyer will do what it's supposed to do. Before the release of a large print run, print 1 copy and hang it on the door. Step back 3 meters and look at the flyer. Is there anything that got you hooked? Looking at the sample, you should immediately understand that we are talking about about a lost dog.
Probably the most popular marketing tool is Flyers. An easy way to talk about your unique offers, discounts, promotions and bonuses, thereby stimulating demand. Or simply attract new customers by talking about your company, its product offering.
What should be in a leaflet so that a person starts reading it? To be useful?
The informational part of the leaflet gives the complete information the customer needs to get to know you, contact you and purchase the product. Who are you, what do you sell, what profitable terms you suggest how to find you and place an order.
The selling part makes it clear to the client that he will lose the meaning of life if he does not buy your product. That's it, and nothing less. Benefits, benefits, benefits. Why your product for the client or your company is good. What will he get and what problems will he solve forever in his life if he buys your product.
Let's take a closer look…
Information for the client
What does the informational part of the leaflet include?
You must indicate the name of the company, otherwise the client simply will not understand who you are. Next, you reveal the essence of your product offer, product concept. What do you offer, what do you sell. Here the client already decides whether you are interesting to him or not.
Be sure to include ways to contact you. Where does customer comet buy goods? How can he find you? How to find out more information?
Indicate phone numbers by which you can place an order or find out details about the product, the promotion being held. Phones must be with city and international codes, otherwise it will be difficult for you to get through.
E-mail and website addresses are also necessary for the client, because not everyone has the opportunity to call.
Information about the operating mode of the enterprise and the timing of the promotion itself or discounts will be very useful, and they must also be indicated. Moreover, the limitation on the duration of the ongoing promotion can encourage the client to make a purchase.
If there are restrictions on the purchase of your product, or the conditions for participation in the promotion, be sure to focus on them so as not to mislead your buyer.
Therefore, specialists in the preparation of advertising texts - copywriters - are engaged in it. For him, compose a catchy headline that will make it easier to start reading the leaflet than the average person.
But if the headline grabs attention, then the list of benefits that the customer will receive by purchasing the product make him read everything. This is the key to creating effective promotional material. What will you get if you buy from us?
The art is to get the client to come to the conclusion that you can better meet his needs. And for this you must know them.
And the most important thing is the call. A call to action that encourages the customer not to think, but to buy. If you do not give the client a stimulating push, then he may simply put your flyer aside. "Now not best time I'll do it later."
Attract the attention of the client, tell him about the product. Show him a photo of the product. Show him what he gets if he buys from you. Or what will he lose if he does not buy. Encourage him to make a purchase immediately and solve his problem. Then your flyer will sell and attract customers, and not lie in the wastebasket.
Information is communicated to people in a variety of ways. Someone creates one-page sites, someone distributes business cards, and some choose flyers.
The latter option is used more often in real life, but as practice shows, if the leaflet is really interesting, people are interested in the offer.
How to create a flyer? This does not require a great mind, but some subtleties need to be known. This promotional material is even used for, but in general, it is more suitable for various events (parties, exhibitions, competitions, draws). Using the Internet, designing a flyer is easy.
How to create a flyer layout?
The first step is to decide what format of flyer you need. There are 2 main formats, these are image and information flyers. In the first case, the emphasis is on design and creativity. In the second form of the main leaflet is the text component.
In any case, the text of the flyer will have to be written, and when developing it, you need to take into account several rules:
- one thing is described (product, service, etc.);
- the target audience is necessarily determined for the correct presentation of information;
- use ;
- format the text so that it attracts attention;
- use interesting fonts;
- there must be a call to action;
- it is desirable to tell about some discount or promotion;
- use .
In general, it is necessary to develop a quality advertising text. If you doubt your abilities, place an order for, professional copywriters earn through this exchange.
You can create a flyer online for free
There are many flyer design templates on the web. It is important to choose the design for the theme of your proposal. Consider how the flyer will be distributed e-mail or hand out on the streets.
The best option is to create a flyer in Photoshop. On the site you will find a huge amount of source material. They are added here by professionals, and they are available for free download.
It is advisable to use vector graphics editors, some knowledge is definitely required here:


Many resources have been developed where you can create promotional materials in a couple of simple steps. To show how they work, we've used the very best .
No registration is required, and the interface of the constructor is convenient and simple:

The side menu contains text fields, they can be removed or added. Above the layout being created, there are a few more buttons for adding pictures, changing the font, and so on. In a couple of minutes, we sketched out a simple leaflet text.
Now you need to scroll the page and click the "Next Step" button:

The payment page for printing flyers opens, but this does not interest us. We simply click on the image with the right mouse button and save the image. Now we can use it to send out online or print flyers to hand out on the street.
You will also be interested in:
—
—
WikiHow is a wiki, which means that many of our articles are written by multiple authors. When creating this article, 9 people worked on editing and improving it, including anonymously.
Flyers can be used to spread the word, draw attention to sales or special offers, alert people to fundraisers or other events, or simply for special announcements. Microsoft Publisher allows you to create flyers for any purpose from this list, either from scratch or using built-in templates. You can add vouchers to your flyer to get testimonials from potential customers. Following are the instructions for creating a flyer using Microsoft programs Publisher 2003, 2007 or 2010.
Steps
- In Publisher 2003, select "New" from the New Publication taskbar, then select "Announcements" (Flyers) under Printable Publications, and then click on the button to the left of "Announcements" to see the list existing types flyers. Choose the design you want from the gallery on the right.
- In Publisher 2007, select "Ads" (Flyers) from the popular post types, then select one of the designs. You can choose from modern layouts, classic layouts, or blank pages. You can click on any design to see a larger version of it in the top right of the flyer settings panel, which is located on the right side of the screen.
- In Publisher 2010, select "Announcements" (Flyers) from the existing templates, then select the desired design from the list of flyer templates. You can click on any design to see a larger version of it in the top right of the flyer settings panel, which is located on the right side of the screen.
- If you don't find the design you want, but you have an Internet connection, you can download additional templates from the Microsoft website.
-
Choose a color and font scheme for your flyer. Each flyer template comes with a default color and font scheme, but if you want to use a different color or font scheme, you can do so by selecting the appropriate new scheme. Select a new color scheme from one of the color schemes in the Color Scheme drop-down list and a new font from the Font Scheme drop-down list.
- You can also create your own color scheme or font scheme by selecting the "Create" option from either the Color Scheme drop-down list or the Font Scheme drop-down list.
- If you also produce other marketing materials in Publisher, such as brochures, Gift certificates, or something else, you need to choose the same color and font scheme for all these materials so that your business has a coherent recognizable brand.
-
Add information about your company. If you are using Publisher 2003, the program will prompt you to do this the first time you create a flyer. You can then select this information by clicking Personal Data on the Edit menu. In Publisher 2007 and 2010, you can select a set of information about your company from the Business Information drop-down list, or select New to create a new set of information. This information will be inserted into your flyer.
Create a flyer. In Publisher 2007 and 2010, click the "Create" button at the bottom of the taskbar to create your flyer (Publisher 2003 to present moment automatically implies that you are creating a flyer and does not have a dedicated Create button on its taskbar.)
- At this point, you may want to either print a brochure or create a PDF to email for design feedback.
-
Replace any default text with your own. Click on the text you want to replace and enter the new text in the text box.
- The text will be automatically resized to fit within its borders. If you don't want to limit text certain size, choose AutoFit Text from the Format menu, and then choose No AutoFit (in Publisher 2003 and 2007), or choose Fit Text in the Text group of the Label Format ribbon, and then choose No AutoFit (in Publisher 2010). You can then manually select a new text size.
- Repeat this step for any remaining text you wish to replace on both sides of the brochure.
-
Replace all placeholder pictures with your own pictures. Right-click on the picture you want to replace, then select "Change Picture" from the drop-down menu and choose the location of the new picture. Repeat this step for any other images you want to replace if your flyer has more than one placeholder image.
-
Print out as many copies of your flyer as needed. Before you print your flyer for the first time, make sure it is exactly how you would like it to be.
- If you want your flyer to be printed professionally, you can save or convert it to PDF as most printers prefer to receive documents in this format.
- When you first design a flyer from scratch, you may want to first create multiple flyers from templates and then move elements from them to your blank flyer.
- Try to keep the total number of fonts in your flyer to a minimum. Generally speaking, you should not mix serif and sans-serif fonts, although you can use a sans-serif font for headings and a serif font for body text. Use bold and italics only to make things stand out.
- If you include a coupon on your flyer, make sure the coupon includes your company information, or perhaps a watermark logo, so that anyone associated with you can immediately determine the validity of the coupon when they receive it.
- Try to keep the look of your flyer reasonably (though not completely) symmetrical. To make your flyer more visually appealing, the flyer's point of symmetry should be slightly off-center (assuming you have enough room to accommodate all of the text used and all of the graphics used, of course). Most text that spans more than one line should be either left-aligned or justified, however right-aligned text can be used in some places for emphasis, especially when used in conjunction with designs that use a vertical block of color on one side.
- you can improve appearance Your flyer is even bigger if you use items from the Clip Art Gallery or Layout Library (in Publisher 2003 and 2007), or the Building Blocks group on the Insert ribbon (in Publisher 2010).
Choose a flyer design. Microsoft Publisher groups flyer designs and templates according to the purpose for which the flyer is intended to be used.
A flyer (from the English flyer or flier - a flyer) is an effective, cheap way to quickly and massively advertise. By attracting a consumer audience, it contributes to the expansion of the sales market; allows you to quickly inform about upcoming events, promotions, discounts, receipt of goods, etc.
As a rule, flyers have the form of a small leaflet, often colored, double-sided, and contain information about planned events; sometimes give the right to a benefit or discount. The main purpose of their distribution is to attract the largest number of interested parties in the shortest possible time. Create flyers as advertising printing products, makes it possible to reduce the cost of promotions, marketing campaigns. Allowing you to briefly and informatively present information, they are in demand among companies various areas market (shops, nightclubs, beauty salons, cinemas, etc.).
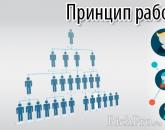
where to start when creating a flyer
In order to make an effective flyer, it is important to outline a number of key aspects.Scheme 1. Preparing to create a flyer
Depending on the marketing functions, distribution features, the nature of the target audience, flyers can be:
fashion - they are created more often in color on high-quality thick paper, sometimes they are subjected to post-print processing;
informational - in the manufacture, priority is given to the most accessible presentation of information.
They may contain various information about prices, product benefits, etc. Often they are a pass to an event, a coupon for a benefit or a discount, they are exchanged for a certain service or product.
It is important that the flyer matches its content, purpose, place and method of distribution, and the interests of the target audience. This should be reflected in the choice of the format of products, their color, design.
How to choose the paper size and type
When creating flyers, preference is given to the following formats:- A6 (105x148 mm);
- A5 (148x210 mm);
- 1/3 A4 (100x210 mm).
If it is necessary to present certain information that requires a relatively large print space and at the same time provide a discount (a ticket to attend an event, a business card), it is advisable to make a flyer with a separate tear-off edge (coupon), which the consumer can save after studying the general information.
The choice of type and density of paper directly depends on the planned service life of the product. For products of a one-time nature (information about the ongoing promotion, new service, receipt of goods) you can use inexpensive medium-weight paper (including thin, offset). To create image printing that has additional functions and is focused on temporary storage, as well as subsequent use, it is advisable to use higher quality dense materials (for example, coated paper).
What are the secrets to successful content and design
In order for an advertising flyer to be read and saved, it must be understandable to the consumer.It is recommended to present information in a concise, accessible form. The main gist of the information presented should be clear after the first few seconds of viewing. There are several rules for preparing the content and design of a successful (working) flyer:
- Clear, catchy title. It needs to be concise, contain understandable words (without complex, difficult to pronounce, poorly remembered terminology) and reflect the main essence of the product.
- Long texts desirable to avoid. They tire, require careful reading and waste of time, which is not always convenient (for example, when distributed on the street, when a person is passionate about his own business). It is recommended to use short, easy to understand sentences.
- The use of graphics must be thoughtful. Illustrations should complement the text, contribute to its correct understanding. Pictures should be placed in such a way that they do not interfere with reading, do not tire the eyes.
- It is advisable to highlight the main proposals. The consumer needs to immediately see their benefit, this will serve as an incentive to study and use the flyer.

Scheme 2. Features of design development
Except general rules design, it is important to take into account the specifics of the target audience. Products should be not only informational, but also outwardly interesting to the consumer. This matters for the choice of color, graphics, overall design style.
What determines the choice of printing option
After the development and approval of the final design, flyers are printed. Application can be done by offset or digital method, less often - on a risograph. The choice of application method depends on:- circulation;
- print color;
- desired production time;
- the need for individual changes.
Offset printing makes it possible to produce flyers from 500 pieces to 5-6 thousand copies using a limited or full palette. This manufacturing method is suitable for those who are not constrained in terms - large orders can take up to 7 days.
Digital printing allows you to make individual changes to products. This method of application is convenient for the manufacture of flyers from 50 copies to about 4 thousand (if the circulation is exceeded, the cost of printing increases significantly). Digital printing is suitable for those who finished products needed here and now. The print is of high quality, good color reproduction. It is possible to use a palette with any number of colors.
Printing on flyers is carried out on one or two sides, depending on the purpose of the product.
Post-print processing for flyers is used to a minimum (cutting, creasing).
A beautiful, well-made flyer is the most convenient handout for promotions. Its price, due to the smaller format, is lower than the cost of producing a leaflet, and the benefits provided to the consumer (discount, invitation to attend events, etc.) make them more attractive in the eyes of the target audience. That is why the flyer often becomes more effective tool print advertising.


Popular
- We analyze the demand for products
- What benefits does small and medium-sized businesses receive when participating in public procurement Electronic trading for small businesses
- Participation in tenders: how small businesses can win government orders E-bidding for small businesses
- How to organize a business on tenders: ideas, perspectives, examples from life How to take a tender for government orders
- Public procurement business from scratch: step-by-step instructions Government orders for small businesses
- How to win tenders for a cleaning company
- Plan of the robbery (Planning Stage)
- How to open a coffee shop from scratch
- How to create your own startup, promote and develop it?
- Selling Christmas trees - the idea of earning money in winter